다크 모드 대응 & ImageView 위 색상 오버레이
구글이 Android 10 버전부터 다크모드를 출시하면서 안드로이드 개발자는 자연스럽게 다크모드를 대응하게 되었다.
관련해서 테마의 경우 구글 문서에 따르면 기본적으로 지원해주지만 보통 디자이너들은 Material Design을 넘어서서 더 이쁜 이미지 리소스와 color 값을 사용하기를 원한다.
해서, 이번에는 간단하게 color resource를 이용해 다크 모드를 대응하는 방법과 image resource는 어떻게 다크 모드를 대응하는지에 대해 학습해보고자 한다.
color resource 다크모드 대응
colors 에 대한 다크모드 대응은 매우 간단하다.
예를 들어서 다음과 같이 기존 프로젝트의 values/colors.xml 에 정의되어 있었다고 가정해보자.
1
2
3
4
5
6
7
<?xml version="1.0" encoding="utf-8"?>
<resources>
    ...
    <color name="baseBackground">#FFFFFF</color>
    <color name="baseTextColor">#2C2C2C</color>
    ...
</resources>
아래와 같이 res 폴더 하위에 values-night 폴더를 생성하고 또 그 하위에 colors.xml 파일을 만들면 color에 대한 다크모드 대응은 80% 완료되었다고 보면된다.
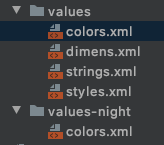
나머지 20%는 생성한 values-night/colors.xml 파일 내에 color 값을 정해주기만 하면된다.
단, values/colors.xml 과 동일한 name에 대응되니 light 모드와 dark 모드는 같은 name을 사용하여야 한다.
1
2
3
4
5
<?xml version="1.0" encoding="utf-8"?>
<resources>
    <color name="baseBackground">#404040</color>
    <color name="baseTextColor">#D8D8D8</color>
</resources>
대응 예시
위의 예시를 layout에 아래와 같이 적용해보면..
1
2
3
4
5
6
7
8
9
10
11
12
13
14
15
16
17
18
19
20
21
22
23
24
25
26
27
28
29
30
31
<?xml version="1.0" encoding="utf-8"?>
<androidx.constraintlayout.widget.ConstraintLayout xmlns:android="http://schemas.android.com/apk/res/android"
    xmlns:app="http://schemas.android.com/apk/res-auto"
    xmlns:tools="http://schemas.android.com/tools"
    android:layout_width="match_parent"
    android:layout_height="match_parent"
    android:background="@color/baseBackground">
    <!-- ㄴ> background 옵션을 통해 배경색 지정 -->

    <TextView
        android:id="@+id/textview_first"
        android:layout_width="wrap_content"
        android:layout_height="wrap_content"
        android:text="@string/hello_first_fragment"
        android:textColor="@color/baseTextColor"
        app:layout_constraintBottom_toTopOf="@id/button_first"
        app:layout_constraintEnd_toEndOf="parent"
        app:layout_constraintStart_toStartOf="parent"
        app:layout_constraintTop_toTopOf="parent" />
     <!-- ㄴ> textColor 옵션을 통해 텍스트 색상 지정 -->

    <Button
        android:id="@+id/button_first"
        android:layout_width="wrap_content"
        android:layout_height="wrap_content"
        android:text="@string/next"
        app:layout_constraintBottom_toBottomOf="parent"
        app:layout_constraintEnd_toEndOf="parent"
        app:layout_constraintStart_toStartOf="parent"
        app:layout_constraintTop_toBottomOf="@id/textview_first" />
</androidx.constraintlayout.widget.ConstraintLayout>
텍스트의 색상과 background 색상이 변화되는 이러한 결과가 나오는 것을 볼 수 있다.
| light 모드 | dark 모드 |
|---|---|
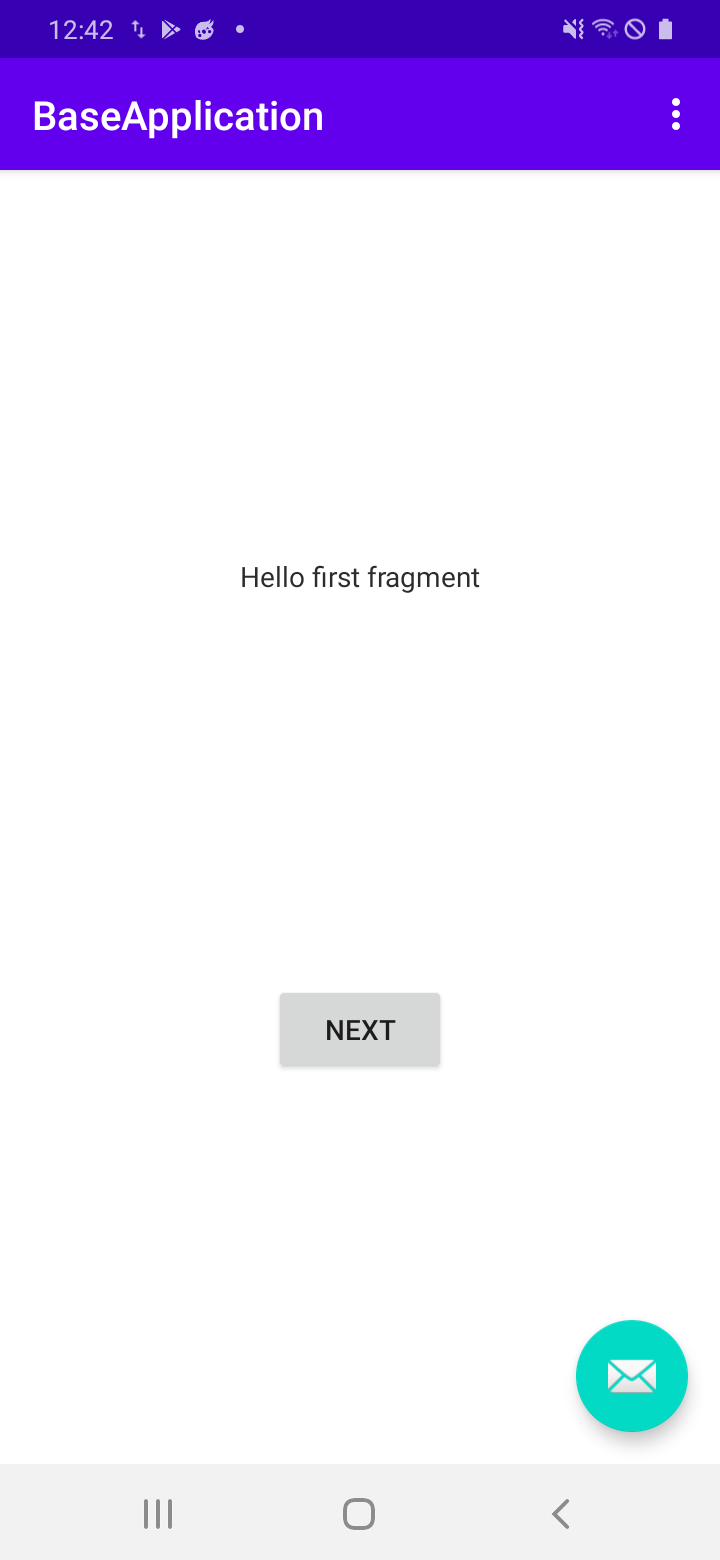 |  |
image resource 다크모드 대응
먼저, 이미지에 다크모드를 대응하는 방법은 color 를 대응한 방법과 동일한 resource 폴더를 통한 대응 과 오버레이 기능을 통한 대응 이렇게 2가지가 있다.
(사실 더 찾아보면 더 좋은 방법들이 있을 수도 있다 😅)
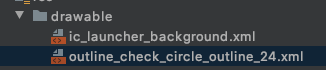
resource 폴더를 통한 대응
이 방법은 color 를 대응한 방법과 동일하다.
아래와 같이 res 폴더 하위에 drawable-night-hdpi 폴더를 만들고,
대응하고자 하는 drawable-hdpi 의 이미지와 동일한 이미지명을 사용하여 다크모드일 때에 보여줄 이미지를 넣어주면 된다.
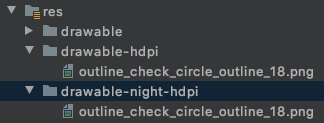
(drawable-hdpi 폴더에는 검정 테두리를 가진 동그란 체크 이미지를, drawable-night-hdpi 폴더에는 하얀 테두리를 가진 동그란 체크 이미지를 넣었다.)
resource 폴더를 통한 대응 예시
아래와 같은 layout 을 만들고 실행시켜 보면..
1
2
3
4
5
6
7
8
9
10
11
12
13
14
15
16
17
18
19
20
21
22
23
24
25
26
27
28
29
30
31
32
<?xml version="1.0" encoding="utf-8"?>
<androidx.constraintlayout.widget.ConstraintLayout xmlns:android="http://schemas.android.com/apk/res/android"
    xmlns:app="http://schemas.android.com/apk/res-auto"
    xmlns:tools="http://schemas.android.com/tools"
    android:layout_width="match_parent"
    android:layout_height="match_parent"
    android:background="@color/baseBackground"
    tools:context=".FirstFragment">

    <TextView
        android:id="@+id/textview_first"
        android:layout_width="wrap_content"
        android:layout_height="wrap_content"
        android:text="@string/hello_first_fragment"
        android:textColor="@color/baseTextColor"
        app:layout_constraintBottom_toTopOf="@id/imageview_first"
        app:layout_constraintEnd_toEndOf="parent"
        app:layout_constraintStart_toStartOf="parent"
        app:layout_constraintTop_toTopOf="parent" />

    <ImageView
        android:id="@+id/imageview_first"
        android:layout_width="30dp"
        android:layout_height="30dp"
        android:src="@drawable/outline_check_circle_outline_18"
        app:layout_constraintBottom_toBottomOf="parent"
        app:layout_constraintEnd_toEndOf="parent"
        app:layout_constraintStart_toStartOf="parent"
        app:layout_constraintTop_toBottomOf="@id/textview_first" />
    <!-- ㄴ> src 옵션을 통해 이미지 리소스를 적용-->

</androidx.constraintlayout.widget.ConstraintLayout>
이미지 리소스가 변화되어 이러한 결과가 나오는 것을 볼 수 있다.
| light 모드 | dark 모드 |
|---|---|
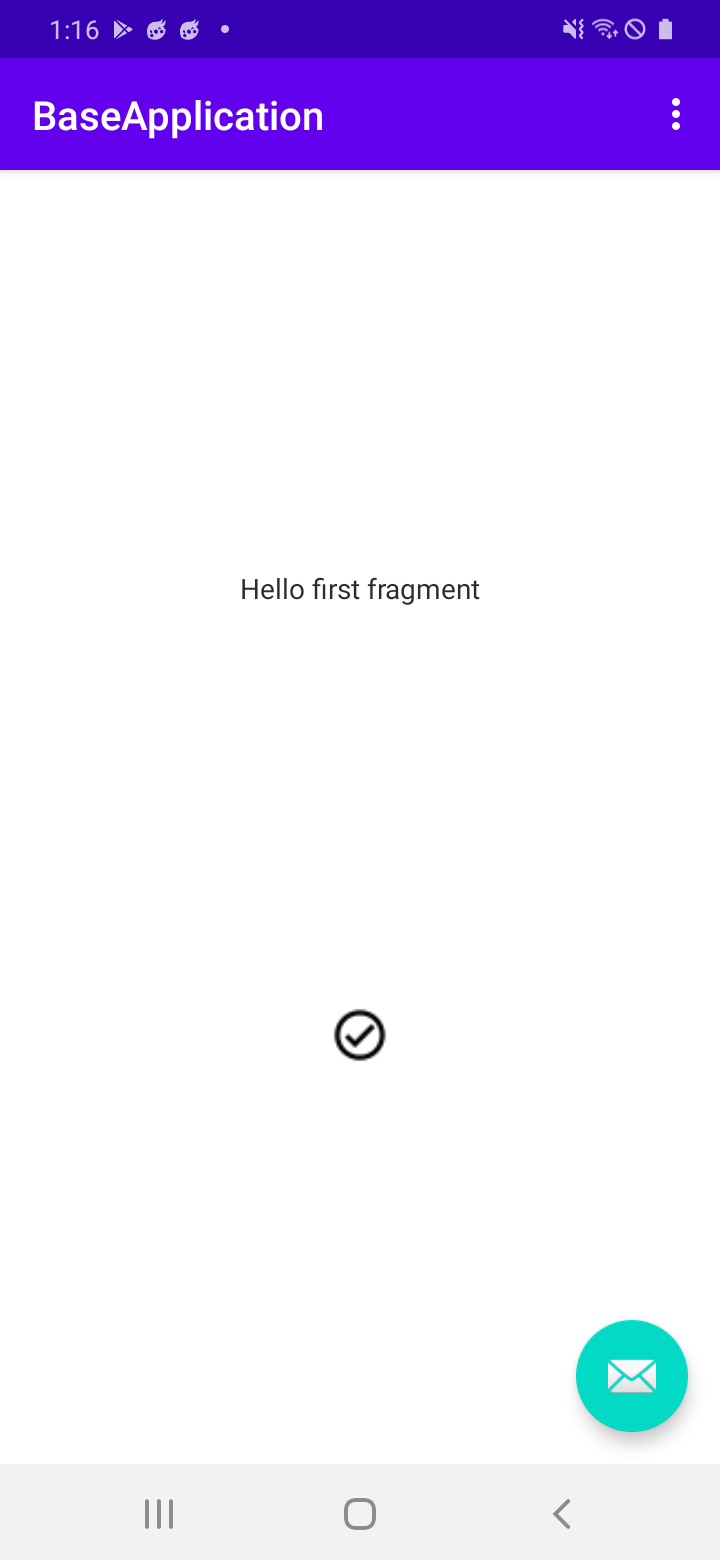 | 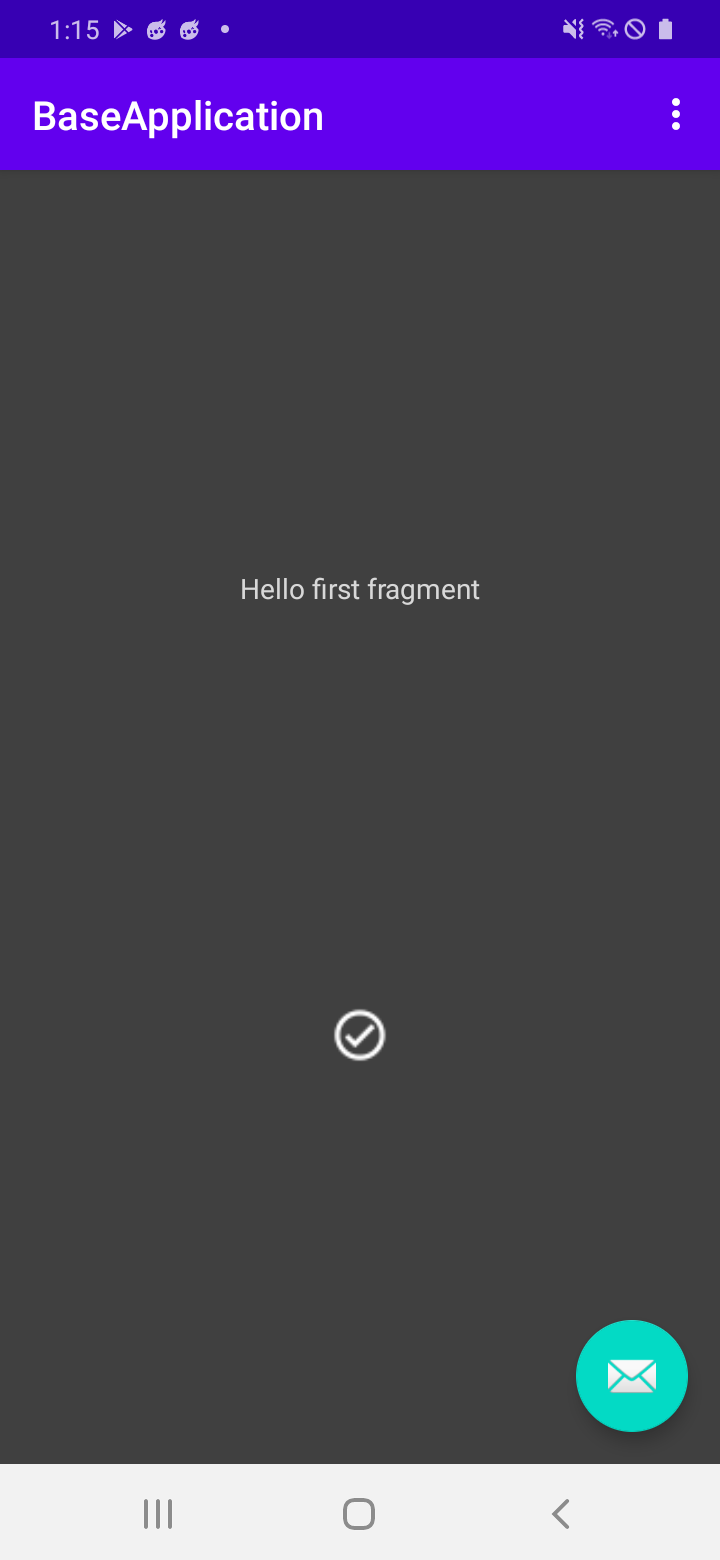 |
오버레이 기능을 통한 대응
앞서 설명했던 mode 별 이미지 리소스를 분리하는 방법이 일반적으로 사용되는 다크모드 대응 방안이다.
하지만 다양한 해상도를 가진 안드로이드 기기의 특성상 이미지는 mdpi, hdpi, xhpdi, xxhdpi, xxxhdpi로 구글이 정해놓은 해상도를 모두 대응하기 위해서는 총 5개의 이미지 리소스를 mode 별로 가져야 하기 때문에 총 10개의 이미지 리소스를 가지게 된다.
하지만 너무 높은 용량을 가진 앱은 사용자들이 꺼려하기 마련이다. (나도 앱의 크기가 너무 크면 잘 안받는 경향이 있는 것 같다.)
그렇다면 어떻게 해야 이미지 리소스를 줄일 수 있을까?
먼저, 우리가 일반적으로 사용한 이미지들(png, jpeg, jpg 등..) 은 raster graphics 라고 한다.
이 이미지를 vector image 로 변경하여 사용하면 해상도별 이미지 5장을 단 1장으로 사용할 수 있게 된다.
(vector image를 만드는 방법은 매우매우 쉬우니 구글링 해보도록 하자..!)
1
2
3
4
5
6
7
8
9
10
11
<vector xmlns:android="http://schemas.android.com/apk/res/android"
    android:width="24dp"
    android:height="24dp"
    android:viewportWidth="24"
    android:viewportHeight="24"
    android:tint="?attr/colorControlNormal">
  <path
      android:fillColor="@android:color/white"
      android:pathData="M12,2C6.48,2 2,6.48 2,12s4.48,10 10,10 10,-4.48 10,-10S17.52,2 12,2zM12,20c-4.41,0 -8,-3.59 -8,-8s3.59,-8 8,-8 8,3.59 8,8 -3.59,8 -8,8zM16.59,7.58L10,14.17l-2.59,-2.58L6,13l4,4 8,-8z"/>
</vector>
위와 같이 vector image 파일을 drawable 폴더에 만들었고 이제 해상도별 기기 대응은 완료되었다.
그렇다면 이제 ‘다크모드인 경우에는 어떻게 해야하지?’ 하고 고민할 수 있다.
이럴 때 사용하는 것이 오버레이 기능이다.
Tint 를 사용한 다크모드 대응
처음에 배웠던 color 다크모드 대응 과 Tint 기능을 잘 사용하면 1개의 vector 이미지로도 다크모드를 대응할 수 있다.
1
2
3
4
5
6
7
8
9
10
11
<!-- light 모드 colors.xml -->
<resources>
    ...
    <color name="baseCheckColor">#FF0000</color>
</resources>

<!-- dark 모드 colors.xml -->
<resources>
    ...
    <color name="baseCheckColor">#0000FF</color>
</resources>
위와 같이 light 모드인 경우 빨간색, dark 모드인 경우 파란색을 가르키는 color value를 정의하고
1
2
3
4
5
6
7
8
9
10
11
    <ImageView
        android:id="@+id/imageview_first"
        android:layout_width="30dp"
        android:layout_height="30dp"
        android:src="@drawable/outline_check_circle_outline_24"
        android:tint="@color/baseCheckColor"
        app:layout_constraintBottom_toBottomOf="parent"
        app:layout_constraintEnd_toEndOf="parent"
        app:layout_constraintStart_toStartOf="parent"
        app:layout_constraintTop_toBottomOf="@id/textview_first" />
    <!-- ㄴ> src 를 통해 vector image 를 지정 + tint 를 통해 오버레이 할 color 값을 지정 -->
위와 같이 tint를 통해 해당 이미지에 오버레이할 색상을 지정해주게 되면 아래처럼 mode 별로 맞는 색깔이 이미지에 오버레이 되어 노출되는 것을 볼 수 있다.
| light 모드 | dark 모드 |
|---|---|
 | 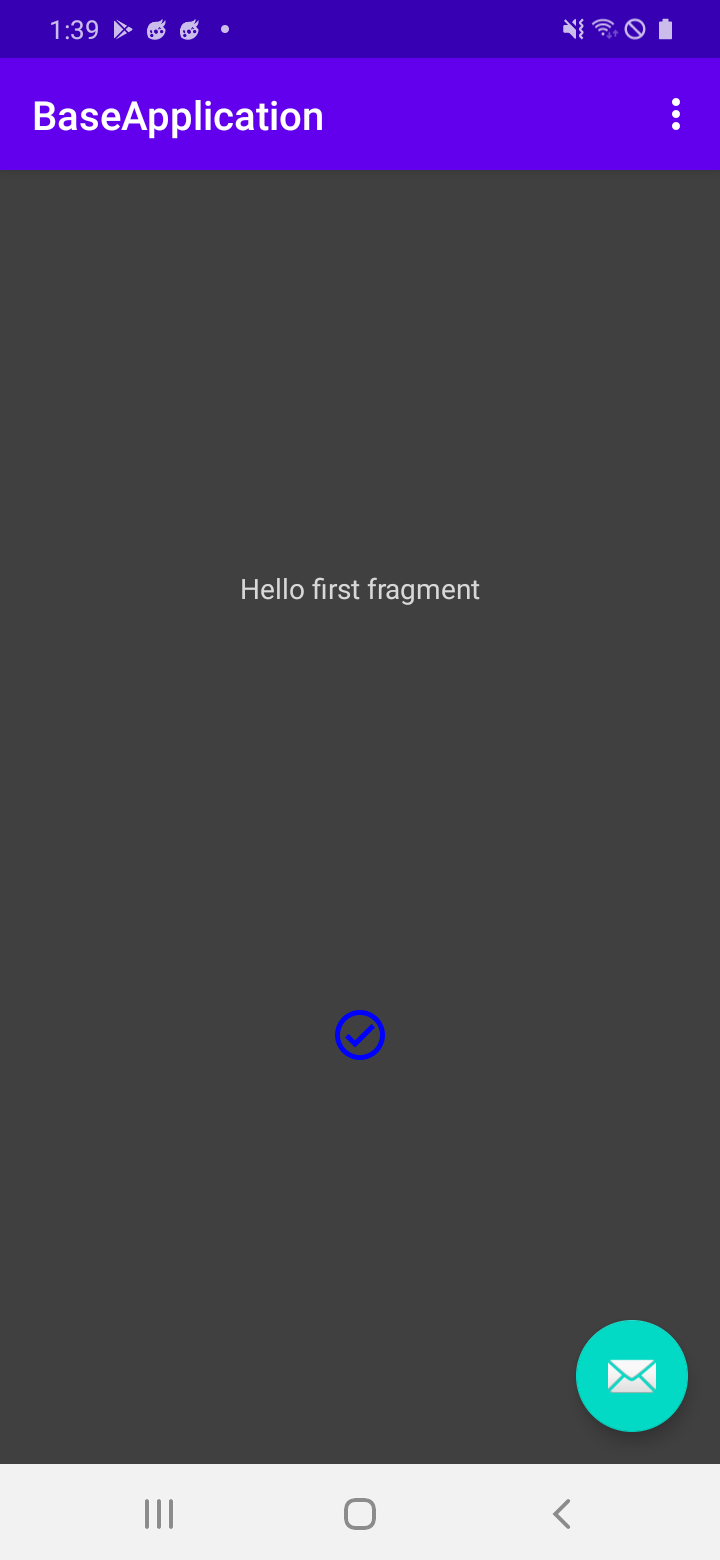 |
회고
이 방법이 올바른 방법인지, 눈에 띄는 용량 감소 효과가 있는지는 사실 정확히 모른다. 그저 하나의 파일이라도 더 줄이고자 하는 생각이 있는 분이 있다면 이 글을 보고 조금이라도 도움이 되었으면 하는 마음에 적어보았다. 사실 ImageView에 색상을 오버레이 하는 방법은 Tint 뿐만 아니라 ColorFilter 라는 것도 있다. 이러한 것들을 잘 사용해본다면 더 optimize 된 앱을 만들 수 있을지 않을까 조심스럽게 생각해 본다. 다음엔 Tint 와 ColorFilter 의 차이점에 대해 한번 학습해보면 좋을 것 같다는 생각이 든다.